organization

Roundup: Stylish Planners, Diaries and Agendas

Do you use a paper planner?  While I use a digital task manager to organize my master list of to-do's, I like to use a paper planner to jot down weekly business notes, and another as a health and wellness diary. There are so many beautiful ones out there that I kinda wish I could find uses for more of them. Below are my favorites:

5 Ways to Repurpose Luxury Candle Jars

In a recent post, I talked about how much I love luxury candles.  I mentioned that a bonus is that they often come in beautiful jars, so once you burn them up and finish enjoying their wonderful scents, you can repurpose the jars and use them to store various items.  Below are five ideas:

1. Makeup brushes and beauty tools:

Hanna's Room

2. Q-tips and cottons:

L: Trendenser, R: Skona Hem

3. Fresh flowers:

dear lovely

4. Office supplies - including pens, pencils, scissors, and paper clips:

70 Percent Pure

5. Small plants - something I hadn't thought of until I came across these images:

tutorials >> L: A Pair and a Spare DIY, R: Luxirare

Roundup: Chic Baskets

Like the trays I featured in my last post, baskets are another one of those products that are very versatile and multifunctional. Use them in all rooms in your home as stylish storage for a number of things that uncontained, would otherwise make a space look cluttered. Use them in the living room to hold magazines, newspapers, extra throws, and firewood. In the family room, use them to hide pet and kids toys. In the entry, use them for shoes, slippers, and things that need to go out the door. In the bathroom, baskets work great for holding extra toilet paper and towels (roll them for that luxurious hotel look). In the bedroom, use them to hold books and extra pillows. In the linen closet, use baskets to hold items that are difficult to fold neatly like wash cloths and fitted sheets.

Below are my finds of baskets which are not only practical, but also stylish enough to integrate into your decor:

chic-baskets-roundup-arianna-belle-for-LDV

1- water hyacinth woven basket, 2- seagrass wicker basket, 3- navy basket, 4- brass basket, 5- white morrocan wedding basket, 6- black lace basket, 7- round belly basket, 8- grey wool basket, 9- blue striped basket, 10- patterned blue basket, 11- whitewash woven storage bin, 12- woven seagrass basket with leather

Roundup: Chic Trays

Trays are a personal favorite of mine because they are so multifunctional and versatile. They work well in just about every room in the house, for both styling and organizing purposes, including in the entryway, living room, office, bathroom and bedroom. You can use them to corral and display a number of small items such as: keys and sunglasses on your entry table, jewelry on your nightstand, beauty products on your bathroom counter, perfume on your vanity, candles and flowers on your coffee table, and office supplies on your desk. Things just tend to look so much neater and like a purposeful vignette when they're within the boundaries of a tray, than when they're spread out randomly.

Below is my roundup of some the most stylish trays out there:

chic-trays-roundup-by-arianna-belle

1- tangle lacquered tray, 2- silver lacquered tray, 3- acrylic leopard printed tray,  4- nude lacquered tray, 5- bone inlay tray, 6- oro de nero tray, 7- gold mirrored round tray, 8- mirrored tray, 9- acrylic zebra printed tray, 10- python tray, 11- orange tray, 12- clear acrylic tray

Organizing Spotlight: NEAT Method

Ok guys, get ready for some serious organizing porn. I recently got a sneak peek at Neat Method's most recent portfolio photos and I was so impressed I just had to share with you all. If you haven't heard of Neat Method, they're a company that specializes in stylish home organization. These girls after my own heart and are so talented, as you'll see from these images of their work below:

 organized closet // Organizing Spotlight: Neat Method // Arianna Belle Blogorganized closet

 organized jewelry // Organizing Spotlight: Neat Method // Arianna Belle Blogorganized jewelry

organized handbags // Organizing Spotlight: Neat Method // Arianna Belle Blogorganized handbags
organized kitchen // Organizing Spotlight: Neat Method // Arianna Belle Blogorganized kitchen
organized dry goods // Organizing Spotlight: Neat Method // Arianna Belle Blogorganized dry goods
organized pantry // Organizing Spotlight: Neat Method // Arianna Belle Blogorganized walk-in pantry

So beautiful right?? Raise your hand if you're feeling inspired to get your home organized! For more, check out the fun before and afters on their website.

Photography by Michelle Drewes

The Packing Strategy That Made My Move Easier and Less Stressful

In an effort to make our move last month, less stressful than our previous ones, I decided we needed to do things a little differently this time around.  During past moves we packed without any type of strategy.  More often than not, boxes would go unlabeled and because boxes didn't clearly indicate which room they belonged in, the people helping us move, would put them down in any random spot in the new place. This would result in an overwhelming first few days (and weeks) living at the new place as unpacking took forever and we would frustratingly run around to each room and open and look through all the boxes whenever we needed to find something that we hadn't yet unpacked.

What brought down our stress a couple notches during this most recent move, was color coding and numbering boxes while packing. Doing this made things much more organized. The movers were able to easily identify what room to put each box in, and once we were moved in, we were able to quickly determine which boxes to open first and also where to find any unpacked item we needed.

For any of you moving soon, below is the strategy we used. I hope it will help make your move less stressful.  If you think this might be useful to someone you know, be sure to share it with them!

The Packing Strategy That Made My Move Easier and Less Stressful

Supplies

label pads in various colors (one color for each room)

a writing pad or notebook + pen

highlighters in the same colors as your label pads

black markers

a piece of poster board

Steps

1. Designate one color for each room in your new place and use the poster board to make a legend. Post this somewhere that's visible while you pack.

2. Designate a landing spot for all of the packing supplies and let anyone helping you pack, know where that is.  A basket, caddy, tray or bin is helpful to corral everything.

3.  When packing a box, label it with a numbered post-it note in the color that corresponds to the room it will be going in.

4. In your legal pad, jot down the number of the box and it's contents. Place a star next to any priority boxes that you'll probably want to open within the first few days of having moved in. *Bonus: If you pack a few different rooms at one time, it's helpful to highlight what you wrote down, in the color that corresponds to the room it will going in.  Doing this will make it easy to later scan down your list when you're checking to see what box something is in.

5. On moving day, post the legend somewhere where the movers or you and your crew will see it upon entering the home. That way, whoever comes in the door with a box, can immediately place it in the room it belongs in.

6. Once you're moved into your new place, refer to your list to determine which boxes you want to open first. As days pass, use your list to help you easily locate any unpacked item you may be looking for.

A Glamorous Dressing Room

Absolutely loving this beautifully organized dressing room from the home of Rita Hazan:

dressing-room-vanity&shoeshelves

 Shoes are neatly arranged on white open shelves (from Ikea!) and beauty essentials are on a glamorous mirrored vanity

dressing-room-makeuptray

A stylish modern black platter helps keep things organized.

dressing-room1

 Such much goodness here - the big window with floor to ceiling drapes, the tufted daybead, the unique gold wall studs, the brass glass pendant...

dressing-room-jewelrytray

patterned tray corrals jewelry and pretty objects.

See more of Rita's home here

photography by Brittany Ambridge and design by Nate Berkus and Jeremiah Brent

Stress Free Weekly Dinner Planning

I previously wrote a post on how I plan dinners for the week.   Since writing that post, I've added an extra element to my little system, that has made dinner planning even easier. I was finding that on busy weeks when my husband and I had limited time to actually sit down to think through what we wanted to eat that week, browse through cookbooks, online recipes, etc., we would end up just rushing to come up with ideas last minute on Monday mornings right before heading off to the grocery store. This would often result in us just deciding on the same few go-to meals over and over since those were what we could think of off the top of our heads.

dinner-planning-howto-arianna-belle-blogTo add variety and help make things as stress free and easy as possible, I decided to take the time one day to list out as many dinners as I could think of that we know how to make and love, as well as a few new ones we've been wanting to try out.  I then typed them all into a business card template (one dinner per box) and printed them on business card paper (I used this because it had a nice decorative border).  Once I had everything printed out, I grouped the dinner cards by category (photo above left) and used little post-it tabs to create category dividers.  I put all the cards in a business card holder (photo above middle), which I adhered strong magnets to the back of (photo above right), so I could stick it up on our fridge - a convenient accessible spot that's right next to the pantry where we keep our dinner planner sheets.

dinner-planning-arianna-belle-blogSo now, when it comes to deciding what we want to make for dinner on any given week, we can grab the cards, quickly look through them and choose one (or two) card(s) for each day. Once we've picked our cards, I fill in a dinner planner sheet with all the ingredients I need to shop for, and then stick up the cards up on our magnetic weekly board. If we change our minds in regards to which dinner we'll make on what day (which often happens), we can easily move the cards around without having to erase and re-write things on the board like we used to.

There are several things I like about this routine. It makes deciding what to make quick and easy so it doesn't feel like a chore.  It eliminates the dreaded "what should we do for dinner?" question. It helps us eat more healthfully since when we have our dinners planned out and all the ingredients on hand, we're less likely to order take out.  It prevents multiple last minute trips to the market, so it saves us time. It helps us avoid getting into a dinner rut by putting into rotation all the dinners we know how to make and love - not just the ones that seem to come to mind most easily.

It does take some effort to set things up, but once you have a system in place, and you use it a couple of times, it'll become habit and you'll find that it makes life a bit easier. For anyone thinking of setting up something similar, here's a list of what you'll need:

  • Magnetic board with the days of the week - the one I have in my home is this one by Three By Three Seattle
  • Magnets
  • Several copies of the Dinner Planner (free printable!)
  • Something to hold and store the planning sheets in a convenient spot - I have a transparent pocket adhered to the inside of my pantry door.
  • Business card paper to make the dinner cards - index cards folded and cut in half would also work well
  • Filing tabs to label and separate your categories
  • A business card holder to hold your dinner cards - if you'll be adding magnets to it like I did to stick it up on the fridge, be sure to get one that has a flat (non-slanted) back

Tips:

  • For recipes you don't know off the top of your head how to make, include a note of where you found the recipe on the card (for example, the name of the cookbook and the page). That way, you can easily find it the day-of.  You can also write on the back of the card the key ingredients for that recipe that you don't usually keep on hand so that you can easily and quickly fill in your dinner planner/shopping list.
  • Keep a few blank cards on hand for adding new recipes
  • If you usually go to more than one grocery store each week like I do, when writing out your shopping list, use different colored pens for each store.  In the dinner planner shown in the photo above for example, I used an orange pen to write ingredients I wanted to get at Trader Joes and a purple pen to write the ingredients I wanted to get at Ralphs.  So when I was at Trader Joes, I just had to focus on the items in orange, and when I was at Ralphs, I just had to focus on the items in purple. I was able to go in and out of each store quickly.
  • Choose a convenient day of the week that you can integrate dinner planning into your routine.  For me it's Sunday so I have my list ready for when I go grocery shopping Monday morning.

@Arianna_Belle(instagram)To follow the system:

1.  Browse through your dinner cards and pick out a card (or two) for each day of the week that you plan to cook at home

2.  Fill in the dinner planner sheet.  Dinners go in the furthest left hand column then ingredients you need to shop for go in the appropriate columns to the right (Produce, Dairy & Refrigerated, etc).

3.  Stick your dinner cards for the week up on your magnetic board.  Assign a card to each day keeping in mind you can always easily move them around later if you want.

4. Grab your dinner planner sheet and go shopping.  Note that the columns on the sheet correspond to the aisles of most grocery stores, making it easy to shop down each column.

5.  Feel good knowing you're prepared for the week!

Let me know if you give this a try. Hopefully I explained things well enough. If you have any questions, feel free to ask in the comments section below.

This post was brought to you by Office Depot.  All thoughts, ideas, and opinions expressed here are my own. Thank you for supporting Arianna Belle sponsors!

My Stylishly Organized Drawer

I recently gave one of my drawers a little makeover with a clear organizer and a roll of duct tape. I used the organizer, which I picked up from Ikea, to separate all my items. It has lots of little compartments that make it easy to designate a spot for each thing. When everything is in it's place, I can quickly find what I need.

As for the duct tape, I used it to create a stylish drawer liner.  3M has a great snake print tape from their new Expressions line that can be used in a lot of creative ways.  Kelly of Fabulous K recently used it to cover a photo frame and Megan of Honey We're Home used it to cover a mousepad and a tray.  To make my drawer liner, I simply measured the bottom of my drawer, cut a piece of poster board to size, covered it with strips of the duct tape and then fit it inside the drawer. Super easy. Looks great and as a bonus, it helps protect my drawer.  If anything spills, I can easily wipe it off. This is what I see when I open my drawer now:

What do you think? Not too shabby huh?

If you're thinking of using snake print tape for a little project of your own, use this coupon for $1 off.

This post was brought to you by Office Depot.  All thoughts, ideas, and opinions expressed here are my own. Thank you for supporting Arianna Belle sponsors!  

How I Organize My Magazine Clippings

Even though there's undoubtedly an abundance of inspiration and information available via digital magazines, blogs, and Pinterest, which I all love, I still very much enjoy receiving printed magazines in the mail that I can physically flip through and rip pages out of, while settled in a comfy seat with a big cup of coffee in hand.  It's a relaxing treat at the end of the day.

As much as I love printed magazines though, I don't like the physical clutter they can create. If you're like me and have several subscriptions, you know how easily and quickly magazine piles can grow and get out of hand if you don't periodically toss them or do something to tame and organize them.

Today I thought I'd share with you my system for keeping my magazine collection in check. While I do keep some magazines in their entirety and treat them as books because they're filled with a lot of visually rich and inspiring content all throughout, what I try to do with most magazines is selectively rip out the pages I want to keep, and organize those pages into binders.

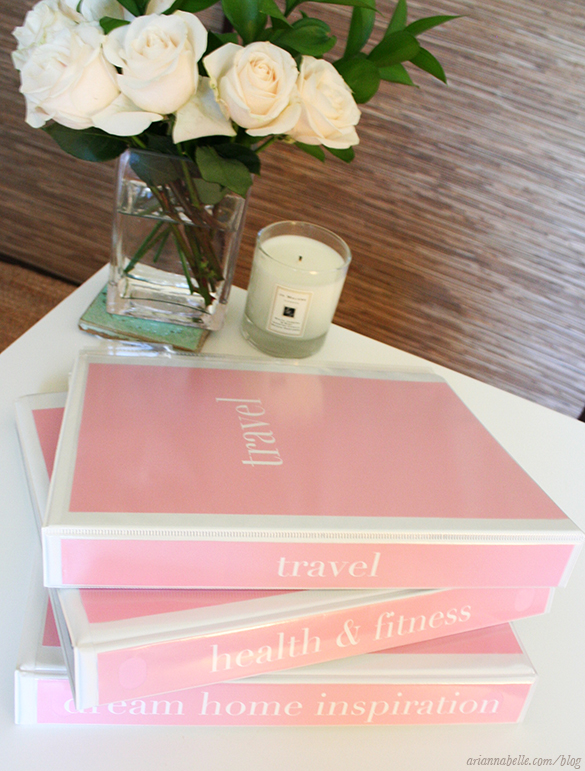
A few of my magazine clippings binders made pretty with simple matching covers

As I'm reading through a new issue, as soon as I identify content I'd like to save, I rip out the page.  It may be an article that I found informational and want to reference in the future, or a city guide for a place that I'd like to visit, or an image with a beautiful color story that I find inspiring. I set aside the pages I've ripped out and (temporarily) put them in what I've designated as a magazine clippings box, because lets be honest, most of the time after reading a magazine, I'm in relax mode, not in organizing mode.

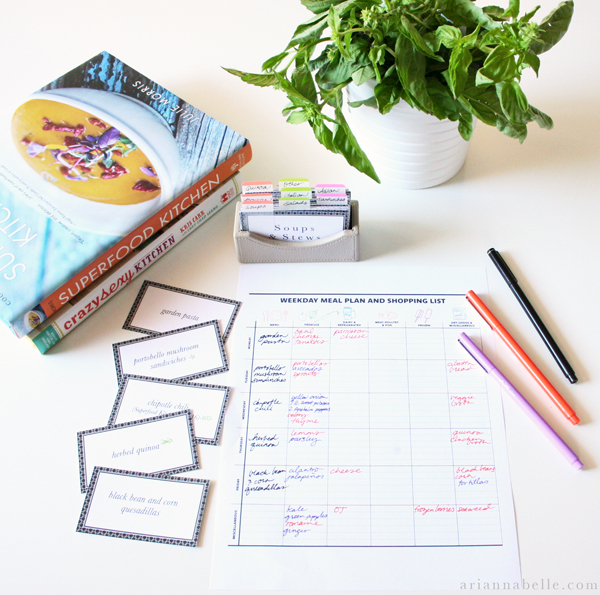
When I'm in the mood, usually on a different day, maybe while watching TV or something, I'll take my magazine clippings and separate them out into the following categories:

Action - things to buy, recipes to try this week, sites to bookmark, etc.

Business - advice, resources and inspiration for my biz

Cleaning & Home Improvement - how to's, tips, guides, reviews for appliances and other home products I don't need or can't afford right now but possibly will later, etc.

Decor - inspiration, products, guides

Dream Home Inspiration - home ideas that I absolutely positively love and dream of  incorporating into my future home

Entertaining - tablescapes, ideas for the holidays, etc.

Fashion - outfit ideas, guides

Food - recipes, cooking tips

Hair & Beauty - ideas and guides

Health & Fitness - informational articles, guides, how to's

Organization - inspiration, ideas, products

Travel - interesting places I'd like to check out, city guides, travel tips

Someday Maybe - projects I might want to try sometime, book lists, movies I'd like to watch, etc.

Wisdom - articles regarding balance, happiness, spirituality, perspective etc. (helpful for getting out of a funk or getting through a depressing time)

With the exception of the Action category, which I have a tray for near my desk (more on my office trays later), I created a binder for all my categories. Each binder is filled with clear sheet protectors and tabbed dividers (for sub-categorizing).  To organize the magazine clippings, I simply put each into a sheet protector in the appropriate binder and under the corresponding sub-category.

My Travel binder with clear tab dividers labeled with sub-categories: Local, Weekend Getaways, National, International, Travel Tips

Here are my tips for anyone who may be interested in doing something similar:

-Go through one or two issues of each magazine you subscribe to, and take a look at the pages you've torn out to help you come up with your binder categories

-Assess your needs before going out to buy supplies.  I personally go through a lot of magazines and tend to tear out a fair amount of pages, so I determined that I needed a separate binder for each category to neatly fit everything in and leave space to add more.  If you're someone who doesn't subscribe to a lot of magazines and/or doesn't tend to tear out that many pages, you may decide you can organize everything into one large binder or maybe combine two or three categories into each binder.  If you need to, you can always expand later.

-Keep in mind also that not all your binders need to be the same size.  Most of mine are 1" but for some categories, like Fashion and Decor, I have 3" binders.

-Make sure you use either extra-wide dividers, or dividers that are specially made for use with sheet protectors (like these). If you get regular dividers, since sheet protectors are wider than regular letter sized paper, you won't be able to see the tabs.

-Label the divider tabs with a label maker for a neater look (if you don't have one yet, I highly recommend getting one, it's so handy!)

-If you want to downsize and organize a collection of back issues you've accumulated over time, do it in batches.  Trying to organize them all at once can be overwhelming.  Plus the process is more fun if you let yourself do it as a leisurely project :-)

*This post was brought to you by the folks at Office Depot.  All thoughts, ideas, and opinions expressed here are my own.  Thank you for supporting Arianna Belle sponsors! 

How I Organize My Handbag

I oftentimes carry a lot of things in my handbag - keys, cell phone, driver's license, credit cards, debit cards, rewards cards, cash, coupons, lists, hair ties, lip balm, lotion, tissues, pens, sunglasses, the list goes on....can you relate?

Because most of these items are relatively small, they can easily get lost in a large bag and it's so annoying to have to rummage through to try to find what you're looking for.  What I like to do is group and separate everything into smaller bags, cases and pouches.

For the essentials like money, driver's license, keys, tinted lip balm, and my cell phone, I use a wristlet that easily fits in my bag and I can pull out when I'm making a quick trip and don't really need much else (the one I have is an old style but you can find a similar one here). I use a magic wallet, which is compact enough to fit inside the wristlet, to keep my credit cards, debit cards, and my license, organized. I keep cash and coins in the little interior pockets of the wristlet. I try not to put anything else in there so that there's enough room to also fit my keys if needed.

For all the non-essential cards that I use less frequently but still like to have on hand, like loyalty cards, rewards cards, gift cards, etc., I use a card cubby and sort them all into the little alphabetized dividers.

My business cards go into a nice business card case so they don't get dirty or bent.

Coupons go into a small expanding file case. There was a time not too long ago when my husband and I were really penny pinching and to make the most of the money we had, I got into the habit of putting coupons for items we frequently bought or stores we normally shopped at, into an coupon file that I took with me whenever I went shopping. This worked really well and I've continued with this habit.  I no longer find myself at the store saying, "aww I had a coupon for that!" and feeling regretful that I could have saved some money.  I labeled this expanding file with general categories like beauty, craft, grocery, office, etc., which makes it easy to find the relevant coupons when I'm at the checkout counter. I use the space in the front for my shopping list and a pen.

In an accessory pouch that has interior pockets, I keep beauty and personal care items that are nice to have handy like hand cream, hand sanitizer, hair ties & clips, lip color, a mirror, oil blotting sheets, floss, a mini lint roller, tissues, bandages and a multi-use ointment.

My miscellaneous items, like a measuring tape, notebook for jotting down notes and ideas on the go, an extra pen, and a backup battery for my phone, all go into a zippered pouch:

Organizing everything this way makes the contents of my bag much less chaotic and allows me to easily find what I'm looking for when I need it. It also makes it much easier to switch handbags. 

So there you have it, that's how I organize my bag.   The general idea is to group like items together and put them into smaller bags, pouches or cases that will keep the contents organized.  I know everyone has different needs and carries around different things, but I hope this inspired some ideas on how to organize your own bag, if it's not organized already.

*The folks at Office Depot sponsored this post.  All ideas/opinions/thoughts are my own.

My Home Office Pin Board

Though I have a lovely gallery wall in my office, what I face when I'm sitting at my desk are two doors - one which leads to the hallway and I almost always keep open, and the other which leads to our laundry room and I always keep closed since there's another door we use to access that space.

For awhile I kept both doors blank, which made for an uninspiring view from my desk.   I finally realized the door I always keep closed would be a great spot for a cork board. While I love Pinterest and use it almost daily, it's nice to be able to pin on an traditional physical board.  It's a great spot not just for inspiring images, but also for notes, reminders, keepsakes, artwork, and fabric swatches.  Plus a cork board gives me a certain tactile experience I don't get when I'm pinning virtually, and by having it in front of my desk it can serve as something beautiful to glance at throughout the workday to give my eyes a rest from the computer screen.

Before heading to the store, I measured my door so I could easily decide what size cork board would make best use of the space. The 24x36 size was just the right width and height.  Not too big, not too small.

To make it fit seamlessly with the decor of my office, I covered the board in a simple white cotton fabric and gave it the look of nailhead trim by adding super inexpensive thumb tacks along the line of the board's frame. Since my place is a rental, I didn't want to make any holes on the door, so I used command strips to mount the board.

Overall the process was easy and I'm thrilled with the results. Here's how it looks:

ariannabelle-board-600w.jpg

I pinned: a few inspiring images (from my virtual boards) that I had printed on card stock, a magazine pull-out, a lovely art piece my sister made for me with the word 'Love' painted in gold, a few fabrics I'm considering for pillows for the shop, as well as a little printed reminder to myself to drink more water, take my vitamins, and make green juice.

For those of you interested in making a similar board for yourself, here's a list of what I used and a few tips:

Tips:

-Iron your fabric before stapling it to the board

-After you staple the fabric on one side of the board, pull the fabric really tight before stapling the other side.

-When placing the thumb tacks, use your thumb as a spacing guide

-Place the command strips on the frame of the board to help them best adhere to the wall

-The strips come in two different colors - black and white.  Since you may possibly be able to see a little bit of the strips from a side view, get the ones that are closest in color to either your wall color or the color of your fabric.

-Most importantly, have fun pinning to your board!

*The folks at Office Depot sponsored this post.  All ideas/opinions/thoughts are my own.

How Monika Organizes Her Jewels & Perfumes

Today I'm delighted to bring to you a new How I Organize post! Shop owner and lifestyle blogger Monika Hibbs (who just became a mom to a sweet baby boy!), gives us a look at how she beautifully organizes her jewelry and collection of perfumes:

I like to have most of my everyday jewelry in place, ready for me to quickly pick up and go! Having all those jewels organized on my side table along side my perfume is perfect!  The silver tray is from The Cross Design, one of my favorite home décor stores in Yale Town, Vancouver. The Stag Head jewelry holder, which holds my bracelets is from Front & Company in Vancouver. 

For pieces that I only take out for special occasions I like to have them all wrapped up in the boxes they came in. I laugh, because my husband thinks I'm a horder- whereas I like the organization of each piece in it's place! Takes up a little bit more room, but those boxes are just too nice to throw away!

headshot photo by Melissa Skoda, all others by Ellen Ho of Hong Photography

Hanging Pot Rack in a Small Kitchen

Last week I did a post on hanging pot racks, which featured mostly large kitchens.  This kitchen below shows how a hanging pot rack can be integrated into smaller quarters:

It works here because there's free wall space, as in the pots aren't blocking any cabinet doors.  They do look quite high up there though, so I'm guessing the homeowner keeps a step stool handy :)

image credit: photography by patrick cline for lonny mag