Beautifully Organized Glassess

Do you have a designated spot for your glasses/sunglasses? While you can certainly just store them in their cases and in a drawer, for those of us though who tend not to use our belongings when they're hidden away, a good option is to keep them corralled in a tray, which allows them to be out where you can see 'em and easily accessible. This works whether you have two or three pairs (like me)...

or you have several pairs...

beautifullyorganized-glasses-hanging2.jpg

Another option is to hang them. A simple sturdy hanger works great.

glasses-organized-on-hanger-ariannabelleblog1.jpg

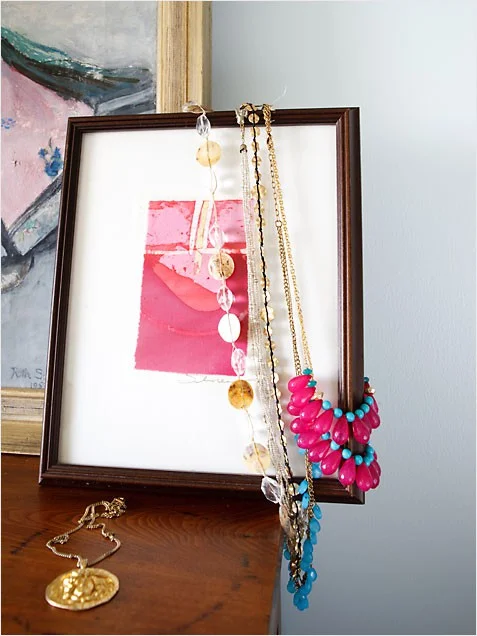
Or you can create a DIY organizer using a frame and wire. Find out how to make your own here and here!

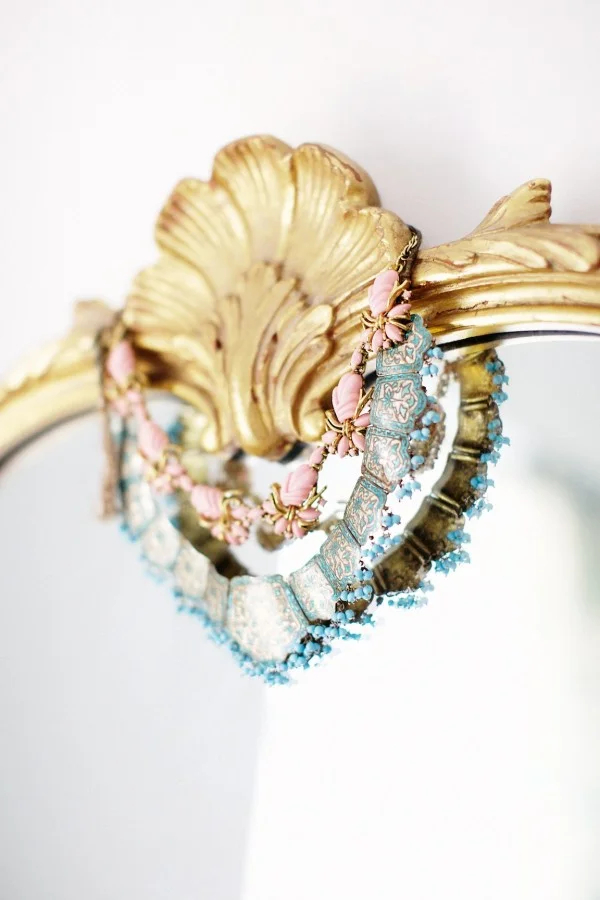
image credits: 1- photography by tinywater via the glitter guide; 2- via lonny blog, 3- photography by anh sunstrom via the glitter guide; 4- via apartment therapy, 5-via pretty stuff tumblr , 6-a beautiful mess, 7-gomming.com

Adding Kitchen Storage

If you have insufficient cabinet space, and happen to have an empty expanse of wall, making use of that by adding shelves, is a great way to create additional storage. Kelly of the Glamourai did just that in her kitchen and I love how it turned out:

and lined each with matching pieces, like those lovely aluminum vintage spice canisters.  (Find similar ones here and here.)

Have you utilized empty wall space to create extra storage in your kitchen? The cabinet space in our new place is definitely limited, but luckily we do have an empty wall, so we'll likely be adding one or two shelves as well as a pot rack similar to this one. I'll share on here once we do!

image credits: all courtesy of the glamourai

Beautifully Organized: Lists

I'm one who loves lists (and have a feeling many of you do as well!) so today I want to share with you my round-up of 10 stylish list pads. Whether it's a to-do list, shopping list, or simply a list of things to remember, it's nice to organize and mind dump everything onto paper, especially onto pretty paper like this:

1-the long list, 2- to-do adhesive notes, 3- 'get it done' notepad, 4- orange zig zag photo pad, 5- striped notepad, 6- oxford pad, 7- peacock pad, 8- happy notes, 9- recycled paper market list , 10-market shopping pad

Tell me, do you love lists? Do you have a favorite list pad for jotting them all down?

Moved In

We're officially moved into the new place! You don't realize how much stuff you truly own 'til you move! The place is filled with boxes and boxes ready to be unpacked. I personally don't enjoy the process of packing, loading the truck, unloading the truck, etc., but I do enjoy the process of unpacking. Probably because it involves organizing!

Now comes the process of getting settled in and making it feel like home. I can't wait to transform the place.  This is what the living room/dining area looked like on the day we got the keys:

It's a nice open layout. From the front door (which you can see on the right in the second photo) you step into a tiny entry and then into the living room. The dining area is adjacent and a sliding door leads out to the patio.  Both the living/dining areas are visible from the kitchen.  The floors are in good condition and there's a working fireplace (yay!).

The color of the walls wasn't bad, however it didn't really work with our existing furniture and since it's a relatively small space, I wanted it to feel as spacious and bright as possible, so decided to paint the walls a lighter color.  I went with Olympic no VOC paint in Horseradish which is a lovely creamy beige.  I didn't get a chance to take a good photo of the freshly painted room, but as soon as I get some of the boxes out of the way, I'll be sure to take one and share with you.

Off to catch up on some work then get a start on the unpacking. I'll share some more updates later in the week!

Dream Dressing Room

So much to love about this walk-in closet: the custom built-in wardrobes painted a lovely grey, the floor to ceiling window that allows for abundant natural light, the glamorous chandelier, drapery and seating...

...as well as the little details like the beautiful crystal knobs and built-in natural oak drawer dividers.

dreamdressingroom2-ariannabelleblog-3-29-12.jpeg

Adding this one to my dream home inspiration file!

image credit: via kvanum

Beautifully Organized: Bracelets

When it comes to organizing bracelets,  a good option for those who like to have things put away out-of-sight, is to dedicate a portion of a drawer to them and use organizers to keep things separated and neat. Clear ones always look nice. Remember to measure before buying!

For those who are more visually oriented (right-brained!) and prefer to have things out, trays are great for corralling pieces and keeping surfaces from looking like a cluttered mess.

BeautifullyOrganized-Bracelets3-AriannaBelle.jpg

Another option is to hang them on a jewelry tree, which makes for a lovely display.

Last but not least, a fun idea is to keep them in pretty vintage cups. Look for ones with a wide enough mouth to fit the width of your pieces.


Hope this post inspired some ideas for your own home!

image credits: 1 & 3 - photography by isa salazar via lonny mag blog, 2- photography by emily johnston anderson via glitter guide, 4- photography by douglas friedman via c magazine, 5-6 glitter guide

How Shauna Organizes Her Spices

This week’s guest participating in the ‘How I Organize’ series is the lovely Shauna of Satori Design for Living who takes a holistic approach to design and organization in helping others beautifully transform their homes. She gives us a peek inside her kitchen and shares with us how she organizes her spices:

I have always loved using spices in cooking, but it usually meant searching through a basket of miss-matched packages, jars and tins to find the one I was looking for. Quite often I’d end up buying multiples of the same spice because it was buried at the bottom of a disorganized mess. I also never kept track of how long I had a particular spice and knew that in order to get the most flavor, whole spices should only be kept for three years and ground spices for just a year. (When a spice is ground, it releases the oils responsible for its flavor and aroma. As the oils dissipate, the spice becomes less pungent.)

To start with, I took stock of all the spices I had and weeded out the ones I never really use. I then bought small jars from the Dollar Store to transfer the spices into. It’s always much better to keep items the same to prevent an area from looking cluttered. I used small jars for most of the spices and larger ones for spices we use in greater quantities. I then found labels from the Martha Stewart line at Staples, printed the spice names using the computer and affixed them to the jars. Next, I applied a clear protective film over the labels to keep them looking new. On the bottom of the jar I affixed a small label and wrote the month and year the spice was put into the jar.

Currently I keep the spices on simple white trays on a shelf in my pantry closest to the stove. I store them alphabetically, with spices used more often at the front. This new system looks visually appealing and makes finding spices a breeze. I like the fact that I’m doing something good for the environment by purchasing small packets of spices (that can be recycled) to refill the jars. I also feel confident that dishes will be flavorful because of the freshness of the spices I use.

How Jocelyn Organizes Her Closet

This week's guest participating in the 'How I Organize' series is graphic designer Jocelyn of The Stylish Type, who makes and sells pretty decor prints on Etsy and frequently shares her uber stylish outfits on her blog. She gives us a peek inside her home and shares with us her beautifully organized closet:

My closet is small and far from the walk-in-closet I would one day like to own. For this reason, I have to be creative with how I organized it and take advantage of every square foot of space I’ve got. That’s where closet storage solutions come in handy. I’m all about using extra hanging rods, shelves, bins, special hangers, and anything else you can get your hands on to make your closet functional. One of my biggest pet peeves is having a huge mess and not being able to see what I own. Accessibility is also important so I organize by type and then color.

My new Real Simple solutions hangers that I purchased at Bed Bath and Beyond are the best for maximizing hanging space. They are ultra-slim and have a built in hook feature that can be used to stack clothing or hang accessories like scarves and belts. Utilizing these babies to their full potential could ultimately give me double the closet space. A belt loop hanger is also a good investment to keep belts organized and visible.

I own a lot of coats for those chilly San Francisco days so I used an extra closet rod to take advantage of the lost space under my tops and skirts. I purchased some stackable shelves to double my shoe storage and used clear bins to store hats, scarves, and clutches. For those narrow spaces where traditional shelves won’t fit, I used an ordinary locker shelf to gain a little extra space. A basket on the floor is also a good place to store extra blankets or miscellaneous belongings.

Extra Tips:

*Use command hooks on the walls to hang hats or necklaces. They are easily to use and don’t require hammering into the wall.

*If you have a door that opens towards you, use the back and hang a shoe organizer. It’s the perfect place to store flats and flip-flops.

Beautifully Organized Linen Closet

Tips and ideas to help get your linen closet looking and functioning its best:

  • Claim a space. Whether it's a single shelf or an entire closet, decide where the best home for your linens is and move out anything that doesn't belong.
  • Get rid of all the linens that you no longer use and you're keeping just because. Maybe it's a pillowcase that long lost it's mate. Sheets that have yellowed. Towels with stains. A tablecloth that no longer works with your decor. You get the point.
  • Sort by type and room: master bedroom sheets, guest bedroom sheets, heavyweight blankets, lightweight blankets, everyday towels, guest towels, tablecloths, etc.
  • Give the shelves/drawers a good cleaning. Bonus points if you line them or give 'em a fresh coat of paint.
organizelinens-domino
  • When it's time to put everything back, arrange by frequency of use. Often used linens should go in the easiest to reach spot, while those that are seasonal or occasionally used, can go in spot that's less convenient to access.
  • Use shelf dividers (or inexpensive bookends like these!) to keep stacks from toppling over onto each other.
  • Keep sets together and make them easy to pull out from the bunch by tucking the pieces inside one of its pillowcases.
  • ...or by tying them with a pretty ribbon (a nice option for less frequently used sets).
  • Keep miscellaneous items that don't fold neatly, in a beautiful box or basket.
  • Make things easy to identify. Label shelf edges using adhesive labels or card holders.
image credits: 1-photography by bahar yurukoglu via brides, 2- photo by david tsay via oprah, 3- martha stewart, 4- martha stewart, 5-better homes and gardens, 6-martha stewart